The First Fruits of Summer

Summer came early this month in the garden. Each year I normally aim to have the first courgettes and beans ready to pick at Christmas time, but this year we started picking these in mid November. I did start the plants extra early though, with mid August sowings (inside) being transplanted to the garden in early October. I would like to say it was all a resounding success, but it wasn't. My cucumbers did a major sulk in the cool and wet of October, to the extent that I decided to start again and these are behind where I have normally got to by early December. So I suspect this is one vegetable that is pays to be patient with.
Courgette "Gold Rush"

Sowing
If you havent got tomatoes, cucumbers, courgette, capsicum, eggplant, and basil planted yet its certainly not too late. However in December I wouldnt be starting tomatoes, capsicum, and eggplants from seed as they need a long growing season - buy seedlings of these if you want to give them a go for this summer. Quicker growing crops such as beans, cucumber, courgette, sweet corn, and pumpkin can still be successfully grown from seed if you start them this month.


Capsicum "Dulce Espana" with bamboo stake and pea-straw mulch

Watering
In the garden, keep your beans, courgettes, and capsicums well watered to maximise plant size, and if your capsicums are still small, unbranched plants, remove all the flowers until the plants are big enough to produce a good crop. Small plants will only produce a few small, misshapen fruit, and fruit growth is best when even night temperatures are around 20 degrees Celcius. Keep your salad greens well watered so that they dont bolt to seed or go bitter.

Dont fear the cost of using the hose! Water in Auckland costs $1.30 per 1000 litres, so the water use for any well run garden will cost only a small fraction of the value of the produce. In saying that, it is a resource so dont waste it. Generally, crops such as tomatoes and beans will grow until mid summer with the moisture they get from rain alone, and they will tell you by wilting if they need it. It is recently planted seedlings, salad greens, and courgettes that get most of my attention with the hose.


Beans "Scarlet Runner"


Fertilising
Liquid fertilise your tomatoes, courgettes, garlic, and capsicums to grow big plants capable of producing a big crop. When these plants start to flower, switch to a fertiliser that is higher in potassium than nitrogen to encourage fruit development over more leaf growth. Most fertilisers are sold with a N:P:K ratio. Its the amount of K that is important for fruiting.


Garlic planted in June, and now growing nice fat bulbs with the help of liquid fertiliser


Training
Tomatoes are best if they are trained up a stake or trellis, keeping one or two main branches per plant. Keeping the plants up off the ground reduces fruit rotting due to ground contact, and makes it easier to find and pick the ripe fruit. At each leaf node, tomato plants will try to grow a new branch, called a lateral. Simply nip these off when they are little with your fingers. Try to do this when they are still small and on dry sunny days - taking larger ones off when it is wet will encourage fungal diseases. Train your tomatoes  tying them to their stakes at 10-20 cm intervals using a soft material. I find old stockings (panty hose) is perfect for the job as it is easy to cut, soft, and the perfect size if cut into strips across the width of the stocking.


Tomatoes being trained up the side of the garden shed with netting and strips of panty hose

If you dont know what a lateral is, the plant on the left of the image below has laterals. These are what you should remove.


I have loved getting the children involved in the garden this month, and have needed to due to surgery that prevents me from bending over. I have been teaching my 9-year old goddaughter how to plant and train tomato plants, so she will grow up knowing a lateral from a leaf, and how to get great crops. With the way I think, I reckon growing tomatoes is a life skill alongside how to cook a meal, or how to wash a car, so its education in action in the home!

My own daughter, who has just turned 3, has been introduced to worms, and the fact that they are the gardener's friend. She will happily and gently hold them before returning them to the soil - there will be no 'worms are gross" with my kids. Annabelle also loves my "made up" stories, and has developed a liking for my worm characters - Squiggly Worm and Baby Worm. I guess they are appealing because Squiggly Worm and Baby Worm live in the garden that she can survey from her bedroom window.

As a brief synopsis of the worm saga so far, Baby Worm was hit on the head by a falling branch, and then lay injured in the garden while the stripey cat, slick starling, and copper skink all walked past without helping. They even tried to pretend that they didnt see Baby Worm by crossing over to the other side of the garden bed as they passed. It was Squiggly Worm, a lowly little creature, that was filled with compassion for Baby Worm and took him home to his worm hole to look after him. After a rest and a good feed of leaves, Baby Worm felt a lot better and returned to his home under the raspberry bushes. I am sure there is a lot of scope for teaching morals and basic truths using the imagined world of our garden.

With the arrival of the first fruits of summer, and the expenses of spring plantings mostly over, the cost-benefit analysis for November looks very encouraging (see below). Remember that this is for a garden that occupies an area 10 x 4 m, including paths, so if you only have half this area it can still make a nice difference to your monthly food bill. With the onset of drier weather I have also calculated water costs, and its good to know it isn't an issue for backyard vegetable gardens being economically viable.

Wishing you a fruit laden summer and a great Christmas and New Year,

Tim
itemcostquantityvalue
alfalfa2.155 packs10.75
beans8.98.25 kg2.245
beetroot4.98.25 kg1.245
boysenberries2.481/2 chip1.24
coriander2.992 packets5.98
courgette3.98.3 kg1.194
garlic1.321 bulb1.32
lemon3.981 kg3.98
lime28.950.06 kg1.737
mesclun3.56 packs21
oregano2.991 pack2.99
parsley2.491 bunch2.49
radish2.991 bunch2.99
rhubarb5.98.5 kg5.98
rosemary2.991 pack2.99
sage2.991 pack2.99
silverbeet2.794 bunches11.16
spring onion2.291 bunch2.29
strawberries2.481 chip2.48
87.051
costs
parsnip seeds1.9911.99
hose watering 100L/5 min1500$1.30/1000L1.95
3.94
benefit minus costs
83.111

Composting: Why bother? (and a quick "how to" guide)

We use a lot of compost in October. Every courgette, tomato, capsicum, and eggplant that we plant gets a good shovelful or two in its hole, as well as a handful of fertiliser. If we had to buy all the compost we use, I conservatively estimate it would cost us about $60 a year (producing three 200L bins per annum at $0.10 per L).

The other way to look at it, is that combined our kitchen scraps and our garden waste makes $1.15 worth of compost each week. I like that even before doing these sums, I have come to look at our food waste as a resource! And of course we are dealing with our own waste, rather than transporting it somewhere else to a landfill.

So how do I compost? Well, quite differently from most people I suspect. For starters I am a bit "over the top" when it comes to composting - we have three large compost bins in the garden. But this does make the job of making compost easier, as well as boosting the volume. I fill the three bins sequentially, and when all three are full, the oldest is ready to go on the garden. This is usually when the material in the bin is 6-12 months old, depending on the time of year (compost rots a lot faster during the warmer months).

To make compost 'the easy way" here are my instructions:
  1.  Site the compost bin so that it gets as much sunshine as you can. The more the merrier, but make sure it gets at least a few hours of sunshine each day. Sit the base so its nice and level, stable, and in direct contact with the ground.
  2. The first layer needs to be coarse, small woody material (garden prunings, sticks, leaves, weeds), Pile this at least 20-30 cm deep in the bottom of the bin. This ensures there is adequate oxygen getting into the heap, which speeds rotting and reduces odour. My compost heaps DONT smell.
  3. Then pile in everything you can compost, but alternate so you get layers of different types of materials. I find good things to compost include: garden prunings (branches up to 1 cm diameter, all cooked or raw food scraps (uneaten leftovers, vegetable scraps), cardboard, paper, used tissues, eggshells, hair (if you get yours cut at home), coffee grinds, weeds (except for wandering jew (Tradescantia fluminensis), oxalis, or anything with long lived tubers or seeds), lawn clippings, and old potting mix. 
  4. Meat scraps, raw or cooked, can be added as long as you cover them at the same time with a good layer of other material, so that you dont breed flies. For most people this is a big NO, but it doesn't actually cause any problems. What I don't do is compost chicken bones or carcasses - the bones break into sharp fragments that later have a tendency to skewer fingers in a rather unhygenic way!. 
  5. Larger garden prunings are OK throughout the heap, following the "if it can rot it can be compost" mentality. It just means that the bits that havent completely rotted yet when you empty the heap get put back in the bottom of the next heap.
  6. Alternating layers is the trick to "anything goes" composting. It makes sure the compost heap isn't too dry, or too wet, or lacking in oxygen, and it helps build a strong worm population. You can be assured your compost heap is working well if its nice and warm when you lift the lid, even if its a cool day.
  7. Keep filling the bin till its full, then leave until its a fine textured, crumbly, dark brown to black humus that is perfect for the garden (6-12 months). If you only have room for one bin, when you get to the top of the bin you will need to put the bottom half of the bin on your vegetable patch, and then put the top half of the compost back into the bin. Its a lot less effort to have multiple bins, and wait until the whole bin is "garden ready". 
If you want instructions on the more standard way to make compost, the following link is a useful website. The principles are the same - alternating layers and sunshine.

composting Wairarapa

Whats growing
Our garden is now almost full and ready for summer. We currently have the following growing:
Tomatoes (9 varieties), eggplants, capsicum, strawberries, raspberries, boysenberries, spring onion, calendula, mizuna, courgette, pak choi, garlic, coriander, lettuces, mesclun, beetroot, radishes, cucumber, basil, beans (Purple King, Dalmation, Scarlet Runner), rhubarb, grape, peaches, apples, rosemary, oregano, parsley, sage, bay, mairehau, thyme, chives, silverbeet.

Tomato planting tip:  When planting, or after planting if you have already got yours in the ground, bury the bottom few centimetres of the stem too. The plant will produce extra roots from the bottom of the stem, giving the plant a growth boost. If you look closely at the bottom of the stem, you will probably see little white nodules - these are roots that are trying to grow above the ground.

Cost/benefit analysis
Benefit minus costs is a bit lower this month - we have done a lot less cooking than usual, and have had some higher costs such as purchase of pea straw, lime, and ZooDoo compost (a compost with animal manure, that we have used for our tomatoes).  Savings year to date (August-October): $83.20, and a summary for the month of October is below.

Happy composting,

Tim


kg/quantity price value
oranges 0.6 3.97 2.38
oregano 1 packet 3.25 3.25
lettuce/mesclun 5 bags 3.68 18.4
bay leaves 1 packet 3.68 3.68
parsley 1 packet 2.99 2.99
rosemary 1 packet 3.25 3.25
thyme 1 packet 3.25 3.25
spring onion 1 bunch 2.29 2.29
lemons 1 kg 3.95 3.95
garlic 1 bulb 1.32 1.32
silverbeet 1 bunch 3.75 3.75
alfalfa sprouts 1 packet 2.25  $          2.25


50.76


costs


alfalfa seeds (c.300 g)

$5.40
ZooDoo compost 40L

$7.60
pea straw 50L

$7.60
garden lime

$7.48
mint plant

$2
chives plant

$2.29


 $        32.37
time spent for October: 2 hours


benefit minus costs

 $        18.39

How to grow a continuous supply of salad greens 365 days of the year

Salad greens are right at the forefront of production in our garden, be it February or July, and always having these on hand provides a significant saving for us as a family. Its also so convenient - if the fridge is empty, there is always something green in the garden to go with dinner.

Dollar value for space used, salad greens are far and away our most productive crop - they take up little space, and you can go from sowing to harvest in six weeks. After a few years of perfecting my cultivation methods, I think I can now share how to do this, based on a few simple principles.

 Mesclun patch (photograph centre) with mizuna and corn salad. Lettuces along front garden edge. Radishes germinating to right, with an old deck chair used as a support for cucumbers.

The first is to have suitable ground, and for our family of 4, about 2 square metres of ground is all that is needed to allow us to pick 2-4 salads per week. The soil needs to hold plenty of moisture, to sustain the crop through the summer months, be relatively fine, and be well composted and limed. In practice, the soil should be roughly 50:50 topsoil and compost, worked to a depth of at least 10 cm, with a dressing of garden lime (like icing a cake) at least twice per year. Within the garden, a full sun position is OK, but if you can find somewhere that gets partial shade during the summer, that is preferable.

With 2 square metres of ground, I would have two 1m2 salad patches.

One patch is used to sow a mesclun mix (Kings Seeds, Original Mesclun mix is what I use). Sow the seeds over a finely worked patch  so they fall at roughly one centimetre spacing, rake over with fingers, then press down firmly. Keep well moist at all times and the seedlings will germinate quite densely, and with a follow up weed at 4 weeks, will dominate the patch of ground for several months. Start picking after 4-6 weeks, and keep picking regularly (pull off individual leaves, or cut at 5 cm above the ground with scissors) and keep harvesting the patch until it goes to seed, turns bitter, or production drops off), then dig it over and start the process again. Sometimes I will get 3-4 months of picking off one sowing, and from one seed packet I get at least 10 sowings. So it works out as VERY cheap, fresh, convenient greens. If you use Kings Mesclun Original expect some seasonal variation - I find that in the winter, mizuna and corn salad are dominant, and in the spring, summer, and autumn, mizuna, endive, pak choi, and lettuces are the best growers.

The second patch of 1m2 is used to grow lettuces, radishes, and calendula (for the bright orange petals). Prepare the ground in the same way, and grow loose leaf lettuces like "cos", "lolla rossa" or "oak leaf". Pick them leaf by leaf, and each plant will produce for several months. By planting new lettuces as soon as old ones get pulled out, the supply of lettuce is continuous, and can cover the periods when the mesclun is between sowing and first harvest. Salads with a mixture of loose leaf lettuce, mesclun, and radish can be easily grown year round. If your garden is in the shade in the winter, like mine is, try to sow a patch of mesclun around April-early May. That way the plants can be well established before it gets too dark and wet.

If you have more space to spare than 2m2, shift the patches of mesclun around the garden to achieve crop rotation (which naturally reduces plant diseases), and why not grow some tomatoes, cucumber, and spring onions too?

Happy gardening,

Tim.

The garden in October: A photographic essay

 View over garden beds planted with silverbeet, garlic, mesclun, coriander, cucumber, courgette, lettuce, spring onion, and calendula.

 The garlic bed: 30 bulbs to be harvested in January (at $1.32 each for NZ garlic). I will then put it into parsnip for a winter crop.
 One of our espaliered apples - all you need is a spare fence to grow apples, pears, peaches, quinces, figs, or grapes. Its not difficult (more a case of tough love for bending and pruning them into shape) and I love the look.
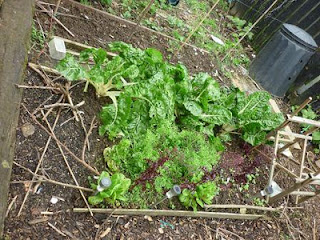
 Our silverbeet grows massive and lush, but I think it is the copious compost and liquid fertiliser it gets that makes this difference.
 Our courgette bed (shortly I will pull out the weaker of each pair). To maximise production I interplant with quick-to-harvest plants like mesclun and pak choi (these are the seedlings you can see germinating everywhere). These will grow to maturity and be harvested before the courgettes engulf the bed for the remainder of the summer. When the courgettes finish in April-May, this bed will become our winter salads bed for 2012.
 Our current salad bed, with carrots (left end), lettuce, mizuna, cress, cornsalad (centre) and radish and cucumber (right hand end).
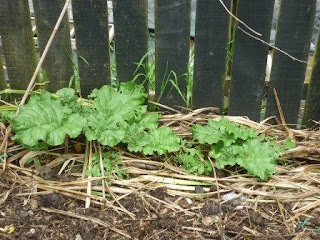
 Recently divided rhubarb with compost added to the bed and a thick mulch of flax leaves to retain summer moisture. The bed was first planted 5 years ago, so was due for renewal. I expect to resume harvest of rhubarb in the New Year, and it will then keep on producing for a few more years.
Heavily composted bed. It might look rough but this is the kind of coarse organic matter that is sometimes needed to inject life into a compacted humus-poor soil. In a few weeks time this will be planted with Thai eggplants.